A furnace wall control swap takes 30 to 45 minutes and needs a screwdriver, a phone camera, and a steady hand. Two very different jobs share one name, though. Learning how to install a thermostat safely starts with checking which one is screwed to your wall. One is a friendly homeowner work; the other carries 240 volts.
Quick answer: Cut power at the breaker panel, photograph the old terminals, label each wire, then mount the new base and land the wires on matching letters. Restore power and run a test cycle on a low-voltage 24 V system; that is a half-hour job. On a 120/240 V baseboard control, treat it as live electrical work.
| Low voltage (24 V) | Line voltage (120/240 V) | |
| Controls | Gas or oil furnace, boiler, heat pump, central air | Electric baseboards, some in-floor and fan heaters |
| Wires at the wall | 3 to 8 thin colored strands on lettered screws | 2 or 4 thick conductors, usually black and red |
| Shock risk | Very low, 24 V control circuit | Real, both conductors stay live until the breaker is off. |
| Typical DIY time | 30 to 45 minutes | 45 to 90 minutes, if you are permitted to do it |
| Paperwork | None | Provincial rules may apply; see below. |
Key Takeaways
- Photograph the old terminals before a single screw moves. It is the free insurance policy that saves the whole job.
- Most smart models need a common wire. Many older Canadian houses do not have one, and there are four ways around that.
- Baseboard heat runs at 120 or 240 volts. That version is not the same task, and provincial rules treat it differently.
- Budget roughly CA$170 to CA$320 for a smart unit, or CA$110 to CA$125 for a line-voltage smart model.
- Check your provincial or utility rebate before you buy. Ontario currently pays CA$100 back on an eligible model.
What You’ll Need
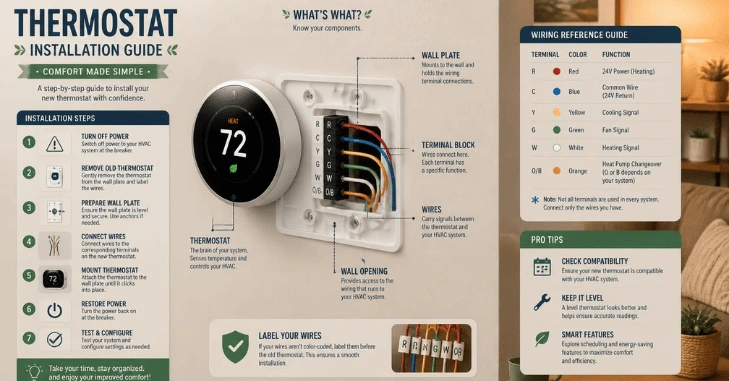
Nothing here is exotic, and most of it is already in a household toolbox.
- A #2 Robertson and a small flat screwdriver
- A non-contact voltage tester, about CA$25 at Canadian Tire or Home Depot Canada
- Masking tape and a pen for labeling
- A small spirit level, or the level app on your phone
- Wire strippers, only if the ends are corroded or too short
- Drywall anchors, usually supplied in the box
- A tape measure for the mounting height, and picking a tape that locks properly matters more than you would guess on a one-handed measurement
Buy the replacement before you strip anything out. A wall with bare wires taped to it is a poor place to start comparison shopping.
Which one is on your wall?
How to install a thermostat This single check decides everything that follows. Statistics Canada reported in January 2023 that 51% of Canadian households with a primary heating system used a forced-air furnace in 2021, while 25% used electric baseboard heaters. So roughly one home in four is looking at the harder version of this job without being told.
Pull the front cover off the old one and look at the wires behind it. Thin, colorful 18-gauge strands mean low voltage. Two thick black or red conductors, often with a wire nut, mean line voltage.
How to Install a Thermostat, Step-By-Step
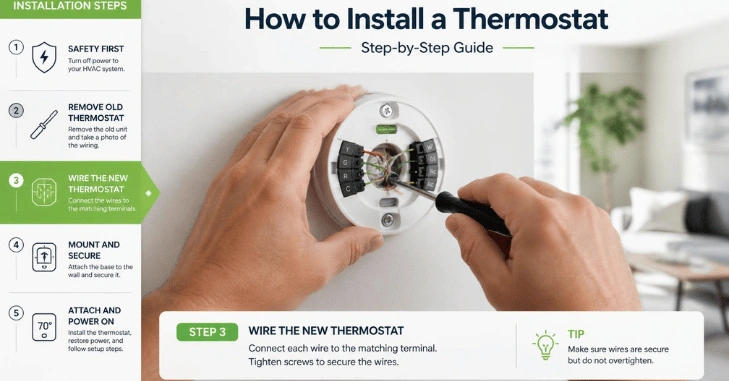
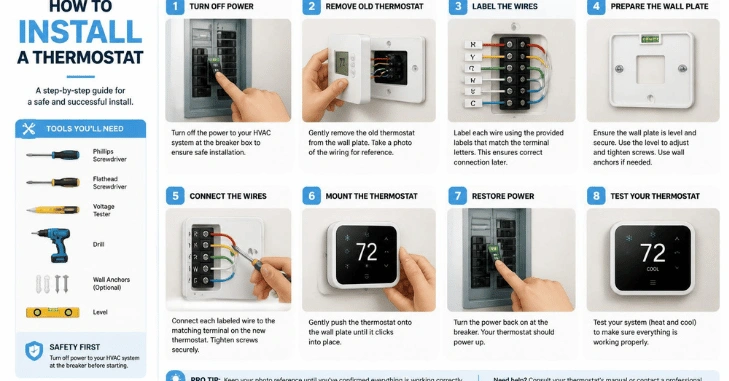
- Confirm compatibility first. Count the wires at the old unit and check that number against the box or the manufacturer’s online compatibility tool. Heat pumps and multi-stage furnaces require more terminals than a simple gas furnace.
- Kill the power at the panel. Switch off the furnace breaker, not just the wall switch on the appliance. For baseboards, turn off the breaker feeding that heater circuit. Confirm the circuit is dead with your tester before touching any conductor.
- Take the cover off and photograph the terminals. Get one straight-on shot and one close-up, with the terminal letters readable. This is the step that separates a smooth afternoon from a service call, and it costs you five seconds.
- Label every wire before you loosen a screw. Wrap masking tape near each end and write the terminal letter on it: R, Rc, Rh, W, Y, G, C. Ignore the wire colors. Installers swap them constantly, so the letter on the screw is the only reliable record.
- Disconnect and secure the wires. Back off each screw, free the strands, then fold the bundle over a pencil or tape it to the wall. Loose low-voltage wires slipping into the wall cavity is the classic way to turn 30 minutes into two hours.
- Unscrew the old base and tidy the wall. Remove the anchors, fill any holes that will not be covered, and touch up the paint if the new plate is smaller. Older units often leave a rectangle of unfaded paint behind them.
- Mount the new base level, about 1.5 m from the floor. Keep it on an interior wall, away from direct sun, supply registers, doorways, and the back of a fridge. A unit reading warm air from a vent will short-cycle your furnace all winter.
- Land each wire on its matching terminal. Feed the bundle through the base, strip about 8 mm of fresh copper if the ends look dull, and tighten each screw on its lettered terminal. Give every wire a gentle tug afterwards. One loose strand is the most common cause of a flickering display.
- Snap the front on, restore power, and test. Turn the breaker back on, set the target several degrees above room temperature, and wait. Heat should fire within a minute or two. Repeat in cooling mode, then work through the app pairing if the model has one.
If your old unit was mercury-based, do not bin it. Municipal hazardous waste depots across Canada take them free, and several retailers run take-back bins.
The C-Wire Problem and Four Real Fixes
Almost every Wi-Fi model needs constant 24 V power to stay online, and that power comes from the common wire, the C-wire. Houses built before the mid-1990s frequently have four wires at the wall and no fifth one. This is the single most common reason a smart upgrade stalls halfway through.
Before you panic, check the wall cavity. Installers often pull a five-conductor cable and cap the spare, so an unused blue or black strand may be tucked inside waiting for you.
| Fix | What it involves | Rough cost |
| Use the capped spare. | Land the unused conductor on C at both the wall and the furnace board. | Free |
| Power extender kit | A small module wired at the furnace control board; needs 4 wires at the wall. | About CA$35 |
| Pull the new 18/5 cable. | Run fresh cable from the furnace to the wall; it’s easy in an open basement. | CA$25 to CA$60 in cable |
| Choose a model that skips it. | Battery-powered or power-stealing designs run happily on 4 wires. | No extra cost |
The adapter route is the usual answer in a finished house. The cable pull is worth the effort in a bungalow with an unfinished basement, since it takes maybe an hour and leaves you a proper connection.
Line voltage: Why Baseboard Heat Is a Different Job
A baseboard control is not a signal switch. It carries the full heater current at 120 or 240 volts, and on a 240 V circuit, both conductors are at the same potential. A single-pole model does not fully disconnect the heater, even when set to its lowest setting. Nothing on that wall is safe until the breaker is off and tested.
Wiring is simpler than the low-voltage version and far less forgiving. Two supply conductors land on the line side, two run out to the heater, and connections are usually made with wire nuts inside the box rather than on screws. Match the unit’s wattage rating to the total connected load, since a 3000 W control will not carry a 4000 W run of baseboards.
Rules vary by province. Electrical work follows the Canadian Electrical Code as adopted by the province, and the authority varies depending on where you live. In Ontario, the Electrical Safety Authority allows a homeowner to file a notification of work for their own home. There is more on this in Knob and Tube Wiring in Canada.
Technical Safety BC issues homeowner permits, though strata owners and non-strata duplexes are excluded. It also notes that swapping an existing device needs no permit when a licensed contractor does the work. Alberta Municipal Affairs runs its own homeowner permit stream. Call before you cut power, not after.
If this swap is one item on a longer list, our renovation planning guides cover how to sequence electrical work around the rest of a project.
Canadian-made options are strong here. Sinopé and Stelpro both build Wi-Fi baseboard controls rated for 120, 208, and 240 V, and they are stocked at Rona, Home Depot Canada, and BMR. Sinopé’s TH1123WF sits around CA$110 to CA$125 and handles up to 3000 W at 240 V.
What this costs in Canada
The hardware spread is wide, and the labor question is usually what decides it.
| Route | Cost (CAD) | Worth it when |
| Basic programmable, DIY | CA$40 to CA$90 | You want a schedule and nothing else. |
| Smart Wi-Fi 24 V, DIY | CA$170 to CA$320 | Forced air or a heat pump, C-wire sorted |
| Adapter kit added | Add about CA$35. | Four wires at the wall, no spare |
| Line-voltage smart control | CA$110 to CA$125 each | Electric baseboards, one per zone |
| Licensed electrician | CA$80 to CA$150 an hour | 240 V work, or no confidence in the wiring |
Most Canadian electricians charge a first-hour minimum of roughly CA$100 to CA$200, which covers travel and the assessment. Worth remembering if you have baseboards in six rooms: batching the whole house into one visit costs far less per room than calling someone back twice.
Check the Rebate Before You Buy
Provincial and utility programs across Canada refund part of the purchase price for qualifying smart models, and most require ENERGY STAR certification. Ontario’s Home Renovation Savings program pays CA$100 back on an eligible unit, with conditions on your heating type and dwelling. Comparable programs run through provincial utilities elsewhere, and terms change from year to year. Confirm the current offer with your own utility before you pay, because a rebate claimed after an ineligible purchase is simply a refused claim.
Nothing turns on? Work Through This
A blank screen after a swap is rarely a sign of a faulty product. Check these in order.
- Is the breaker fully back on, and is the furnace door switch properly closed?
- Did the R wire land on R or Rc, and is the factory jumper still in place if the system needs one?
- Is the low-voltage fuse on the furnace board blown? A 3A blade fuse costs about CA$4 and blows the instant R touches C.
- Are the battery contacts making contact on a battery-powered model?
- Did a strand slip out during the final push into the wall?
Heat that runs constantly, or a fan that never stops, usually points to a misplaced G or W wire. Compare your photograph against the new wiring, and the odd one out will surface quickly.
Your Next Step
How to install a thermostat: Go and take the cover off the old one this evening. Two minutes with a screwdriver tells you which job is in front of you, which model to buy, and whether you need to call anyone. Once the heating is sorted, our home improvement projects cover the next weekend upgrade worth your time.
FAQ
On a 24 V furnace system, yes. The control circuit is low voltage, and the connections are labelled screws. Line-voltage baseboard work is a different matter, and many people should hand it to a licensed electrician.
They follow a convention, not a rule. Red is usually power and white is usually heat, but installers substitute freely. Trust the terminal letter and your photograph instead.
Two wires mean heat only, common on older boilers and baseboards. Plenty of programmable models support it, but most Wi-Fi units for forced air will not.
Low-voltage work needs nothing. For line-voltage circuits, check your provincial authority: the ESA in Ontario, Technical Safety BC, or Alberta Municipal Affairs, since requirements genuinely differ.
An interior wall, roughly 1.5 m up, in a room you use often. Keep it clear of sunlight, exterior doors, kitchens, and supply registers.
It cuts waste rather than consumption directly. Setbacks while you sleep or work do the real saving, and in a Canadian winter that adds up across five cold months.