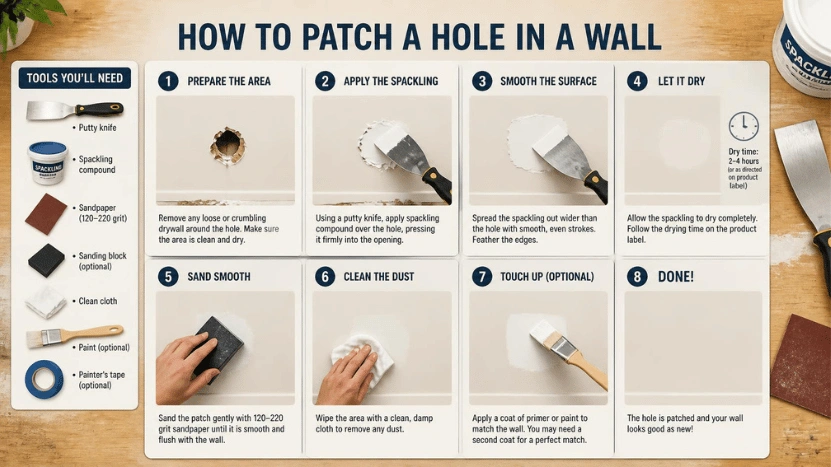
If you’re learning how to patch a hole in a wall, start by matching the repair method to the size of the damage. Fill tiny nail holes with spackle, cover medium-sized openings with a mesh patch and joint compound, and use a supported drywall insert for larger holes. After the repair dries, sand it smooth, prime the area, and repaint it.
A successful wall repair isn’t about piling filler into an opening. The patch needs proper support, thin coats of compound, smooth edges, and enough drying time before sanding.
| Damage | Best repair method | Main materials | Difficulty |
| Nail or screw hole | Fill directly. | Lightweight spackle | Easy |
| Small opening of about 1.3 cm (½ in.) or less | Fill directly. | Spackle, putty knife | Easy |
| Medium-sized opening | Reinforced patch | Mesh patch, joint compound | Easy to moderate |
| Large opening | Drywall insert | Drywall, backing strips, screws, tape, compound | Moderate |
| Wet, soft, or repeatedly cracking area | Find and fix the cause first. | Depends on the problem | Consider professional help |
Small nail and screw holes can usually be filled directly. Wider openings need reinforcement so the repair doesn’t crack, sag, or sink later. Large damaged sections often require a new piece of drywall secured to backing strips or framing.
What You’ll Need Before You Start
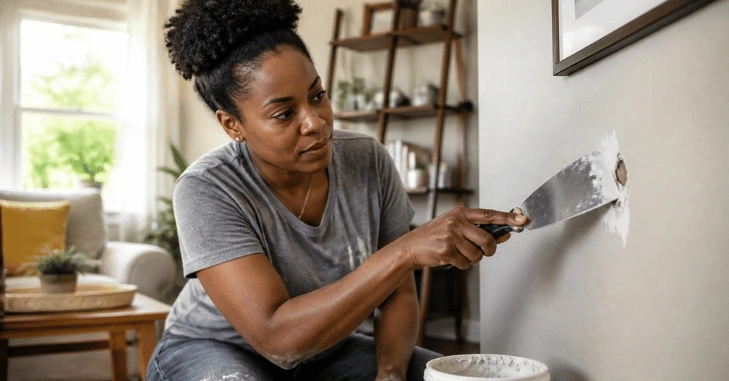
For a small repair, gather:
- Lightweight spackle
- A flexible putty knife
- Fine-grit sandpaper or a sanding sponge
- Primer
- Matching wall paint
A medium-sized repair may also require:
- A self-adhesive mesh patch
- Joint compound
- A wider drywall knife
For a larger repair, you may need:
- A utility knife
- A drywall saw
- A tape measure
- A replacement piece of drywall
- Wood backing strips
- Drywall screws
- A drill or screwdriver
- Joint tape
- Joint compound
Spackle and joint compound serve different purposes. Spackle is usually better for small holes and dents, while joint compound works well for taped seams, mesh patches, and wider repairs.
If you need to measure a replacement drywall piece, HomeCraftly’s measuring tape guide explains how to take accurate metric and imperial measurements.
How to Patch a Hole in a Wall: Don’t substitute wood filler for drywall compound. Wood filler is designed for trim, furniture, doors, and other wood surfaces. HomeCraftly’s wood filler guide explains where that product works best.
Check Behind the Wall Before Cutting
Before enlarging an opening, check what may be behind the drywall. Electrical wiring, plumbing pipes, insulation, or other building components can run through the wall cavity. Use the existing opening and a flashlight to inspect the area when possible. Locate nearby studs before making a wider cut.
If the damaged area is close to an electrical outlet, switch, or fixture, turn off the appropriate circuit before cutting. If you see wiring or aren’t sure what lies behind the wall, avoid cutting deeper until you can identify the obstruction.
You should also stop if you find moisture, wet insulation, mold-like growth, or soft drywall. Repairing the visible opening won’t solve an active leak or moisture problem.
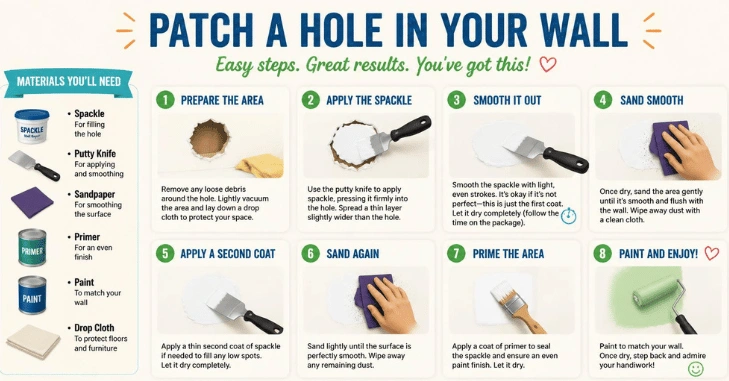
How to Patch a Hole in a Wall in 7 Steps
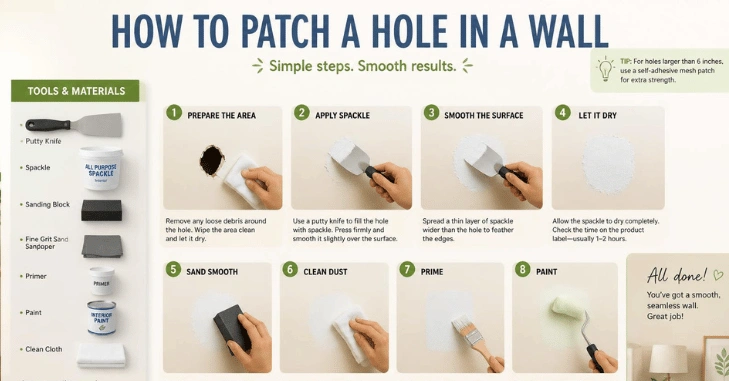
- Inspect the damage and determine its size.
Remove loose paper, paint flakes, or crumbly gypsum. Decide whether the opening needs simple filler, a reinforced patch, or a new drywall insert. Don’t cover damage caused by an active leak until the source has been fixed. - Prepare the damaged area.
Carefully trim loose edges and lightly sand raised paint or torn drywall paper. Wipe away dust so the filler or compound can bond to a clean surface. Avoid removing solid material around the opening unnecessarily. - Choose and install the correct patch.
Press spackle directly into nail holes and other tiny openings. For medium-sized damage, center a mesh repair patch over the opening. Large holes require a fitted drywall piece secured to backing strips or nearby framing. - Apply a thin coat of compound.
Spread spackle or joint compound across the repaired area with a putty knife or drywall knife. Cover the patch completely without creating a thick mound. Thin coats are easier to smooth and produce a cleaner finish. - Feather the outer edges.
Spread the compound beyond the damaged area while gradually reducing pressure toward the edges. This creates a smooth transition between the repaired section and the surrounding wall. - Let the compound dry and sand it smooth.
Follow the drying instructions on the product label. When the material is fully dry, sand it lightly until you can run your hand across the area without feeling a noticeable ridge. Add another thin coat if you find a dip or uneven section. - Prime and repaint the area.
Remove all sanding dust before applying primer. Once the primer is dry, repaint the repaired section with matching wall paint. Primer helps the fresh compound absorb paint more evenly.
How to Make the Patch Less Visible
One of the most common beginner mistakes is applying too much compound. A patch may hide the opening but remain noticeable if it creates a raised area on the wall. For a closer look at this, see How to Replace Toilet Seat.
Use a lamp or flashlight held almost parallel to the surface. Light coming from the side makes small ridges, dips, and rough areas easier to see.
Sand raised spots gently rather than trying to remove a large amount of material at once. If you discover a shallow dip, clean away the dust and apply another thin coat of compound. Let the new layer dry completely before sanding it again.
Paint matching also affects the final appearance. Even if you have the original paint color, older wall paint may have faded or changed slightly over time. In some cases, repainting a larger section from one natural edge to another can produce a more consistent finish.
For more household repair ideas, visit HomeCraftly’s Home Improvement section.
When a Mesh Patch Is Enough
A mesh patch is useful when an opening is too large for filler alone but small enough that replacing a full section of drywall would be unnecessary. The mesh creates a stable surface over the opening. Joint compound covers the mesh and extends onto the surrounding drywall.
Apply several thin coats rather than one thick coat. Allow each layer to dry before adding the next one. Don’t try to bridge a wide, unsupported opening with joint compound alone. Without reinforcement, the material can sag into the wall cavity, crack, or break when bumped.
When You Need a New Piece of Drywall
Large openings, broken drywall, and damage with weak or crumbling edges usually require a replacement piece. Start by trimming the damaged area into a clean, manageable shape. Install wood backing strips behind the opening if there isn’t enough framing to support the patch.
Cut a replacement piece of drywall to fit the opening, then screw it securely to the backing. Apply joint tape over the seams before covering them with thin coats of joint compound. Try to match the thickness of the existing drywall. A replacement piece that sits too far forward or too far behind the surrounding wall will be harder to disguise.
Should You Repair the Wall Yourself or Call a Professional?

Small and medium-sized cosmetic holes are manageable DIY repairs for many homeowners. Larger repairs require more cutting, measuring, fastening, taping, and finishing.
Consider calling a professional if:
- The damaged area keeps cracking after repairs.
- The drywall feels wet, soft, or swollen.
- Water damage covers a large area.
- Several sheets of drywall are affected.
- Electrical wiring or plumbing complicates the repair.
- You can’t identify the cause of recurring damage.
- The wall has a difficult texture that must be matched closely.
A professional repair may also be worthwhile when the damaged area is highly visible, and you want the finish to blend closely with the surrounding wall.
Take Your Time With the Finish
A drywall repair often looks better when you spend more time smoothing and feathering the compound than filling the opening itself. Choose the repair method based on the size of the damage. Give large patches enough support, apply compound in thin coats, and let each coat dry before sanding.
Once the repaired surface feels smooth to the touch and looks flat in side lighting, prime and paint it. With careful preparation, even a noticeable hole can blend neatly into the surrounding wall.
Explore HomeCraftly’s home repair and improvement guides when you’re ready for your next DIY project.
Conclusion
How to patch a hole in a wall is a practical and inexpensive home improvement project when the damage is minor. With the right materials, careful preparation, smooth sanding, and a good paint match, you can achieve a clean and professional-looking finish.
Frequently Asked Questions
Start with a small nail or screw hole. Clean the area, press spackle into the opening, allow it to dry, sand it flat, apply primer, and repaint the spot. Once you’re comfortable with filling and sanding, you can move on to mesh patches and larger drywall repairs.
Yes. Tiny nail holes, screw holes, and other small openings can usually be filled with spackle without adding mesh. A wider opening needs reinforcement if the filler can’t support itself across the gap.
The number of coats depends on the size and depth of the repair. A shallow repair may need only one or two coats. Medium and large patches often require several thin coats to achieve a smooth transition to the surrounding wall.
Drying time varies by product, coat thickness, temperature, and humidity. Follow the manufacturer’s instructions on the container. Sanding before the material is fully dry can damage the repair and create an uneven finish.
A visible patch may have raised edges, a shallow dip, a different texture, or uneven paint absorption. Inspect the area with side lighting. Correct any uneven compound, sand the repair again, remove the dust, and apply primer before repainting.