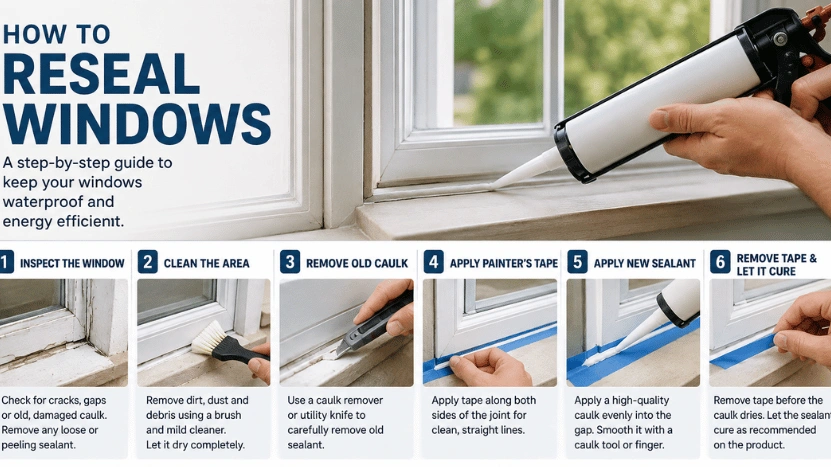
Learning how to reseal windows starts with finding the failed seal, not squeezing caulk into every gap. Check whether air enters around the sash, trim, or exterior frame. Then remove any loose material, dry the joint, apply the correct seal, and test the result after it has cured.
Caulk closes stationary gaps around trim and exterior frames. Weatherstripping seals the moving joint where a sash closes. Treating them as the same product causes many quick repairs to fail. The joint needs a clean, dry surface and a sealant that can move with the frame. No shortcuts.
| Location of the gap | Usual material | What to check first |
| Exterior frame to siding or brick | Exterior-rated flexible caulk | Cracked bead, loose edges, drainage path |
| Interior trim to wall | Paintable interior caulk | Small trim gap and indoor draft |
| Moving sash edge | Weatherstripping | Compressed, torn, or missing strip |
| Cloudy glass between panes | Professional assessment | Failed insulated-glass unit |
Key Takeaways
- Use caulk on fixed joints and weatherstripping on moving joints.
- Never seal over damp wood, loose paint, or an active water path.
- For a deep joint, the backer rod gives the new bead a better shape.
- Call a professional for rot, failed insulated glass, or a frame that moves.
How to Tell Whether the Seal Has Failed
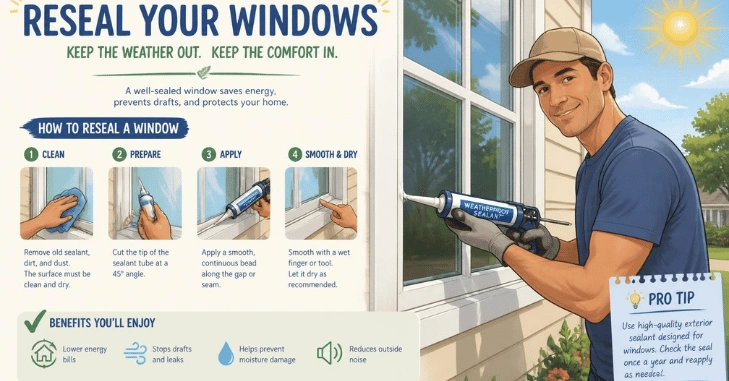
Look for a bead that has split, pulled away, or turned brittle. Indoors, feel for a draft on a cool day and inspect trim corners for fine gaps. Outdoors, inspect the perimeter after rain. Water stains, peeling paint, or a soft frame mean you should investigate the source before closing the joint. Check twice.
How to reseal windows: A sheet of paper provides a simple sash check. Close the sash on the paper and pull gently. If it slides out with little resistance at one spot, worn weatherstripping may be the issue. That test is more useful than adding caulk where the sash needs to move.
Moisture marks can spread from a leaking frame to nearby finishes. Once the source is solved and the surface is fully dry, you may also need to remove water rings from wood trim without damaging the surrounding finish.
Choose Caulk or Weatherstripping
Use exterior-rated flexible caulk where the fixed frame meets siding, brick, or another exterior finish. Use paintable interior caulk for narrow gaps around indoor trim. Weatherstripping belongs where a sash, door, or access panel moves against a stop. A bead placed in a moving joint will tear when the window opens.
Read the product label before opening the tube. It should suit the surface, expected movement, and exposure. Buy enough to finish one side in a steady session, but do not choose a product simply because the nozzle looks convenient. Good adhesion matters more than a fast application.
What You Need
- Utility knife or scraper, used carefully.
- Stiff brush, clean cloths, and a vacuum.
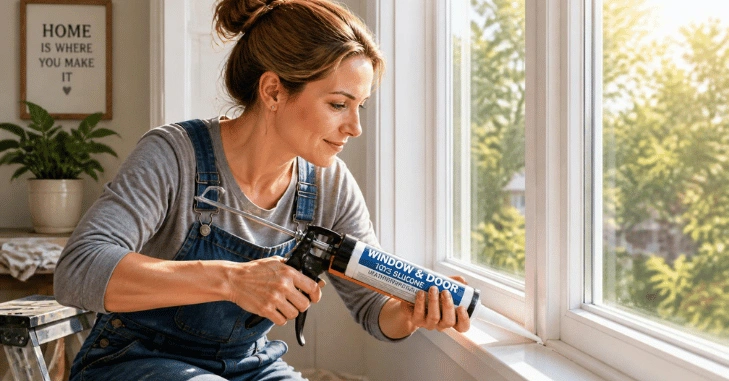
- Caulk gun and the correct sealant for the joint.
- Foam backer rod for a wide or deep fixed gap.
- Painter’s tape, a bowl of clean water, and gloves.
Keep the floor beneath an indoor repair clean and covered. Dust, old paint flakes, and cured caulk can scratch wood finishes when stepped on. This checklist on how to protect hardwood floors during home repairs is a useful preparation step before you start.
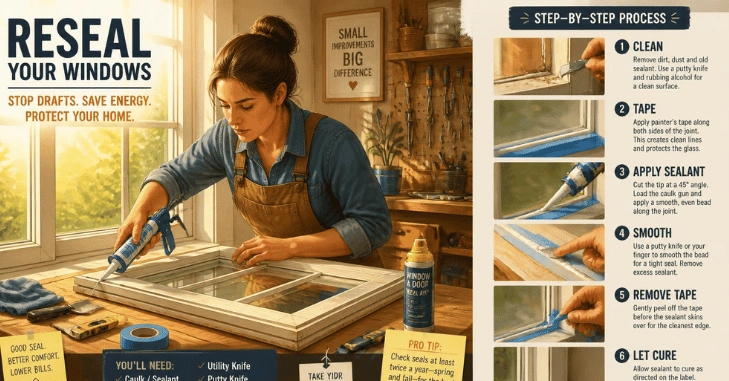
How to Reseal Windows in 7 Steps
- Pick a dry work period. Plan the repair for a dry day, then check the product label for its own temperature and curing guidance. The joint and surrounding materials need to be dry. Do not begin just after rain, snowmelt, or a heavy wash-down. There is no universal curing time.
- Locate the exact failed joint. Mark cracks in the old exterior bead, loose trim edges, and worn strips separately. Solve drainage or flashing trouble before sealing.
- Remove failed material. Cut along both edges of the old bead. Pull it out in short lengths, then scrape remaining loose pieces without gouging the frame.
- Clean and dry the surface. Brush the joint, vacuum dust, and wipe away residue. Let the area dry fully. Fresh sealant cannot bond well to wet fibers or chalky paint.
- Add backer rod where needed. Press it into a deep exterior gap without stretching it. The foam supports the bead and prevents wasting sealant deep inside the joint.
- Apply a controlled bead. Cut a small nozzle opening. Hold the tip at a steady angle and move slowly enough to fill the joint, not coat the surrounding wall.
- Tool and inspect the bead. Smooth it once with a damp finger or suitable tool. Remove tape while the material is fresh, then leave the area undisturbed according to the label.
Small, patient passes produce a neater result than a long bead that must be corrected later. If the caulk pulls away while you smooth it, stop. The surface may still be damp, dusty, or too loose for a lasting repair.
Use the backer rod correctly.
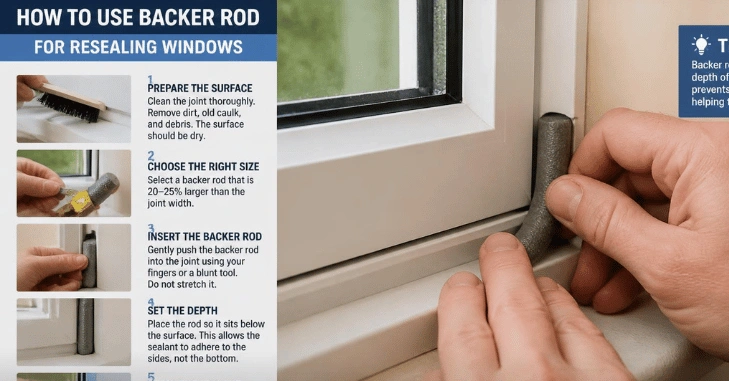
The backer rod is foam cord for a joint that is deeper or wider than the caulk bead should be. It gives the sealant a surface to bridge and helps you keep a tidy profile. Press it below the opening with a blunt tool. Do not puncture it with a sharp screwdriver.
The goal is a flexible surface seal, not a joint filled solid with material. A controlled bead can expand and contract more freely. If the gap is unusually large, the trim has pulled away, or the frame shifts when pressed, pause the repair and ask a window professional to assess the cause.
Interior and Exterior Checks After Curing
After the label’s curing period, inspect the bead in daylight. Look for skips, edges that lifted, or a section that looks thin. From indoors, repeat the paper test at the sash. From outdoors, make sure you have not closed a designed drainage opening at the bottom of the frame.
Do not aim a high-pressure hose at the repair. A gentle visual check after ordinary rain is more realistic. Track any recurring damp spot with a date and location. That record helps a professional find a larger flashing or frame problem if the seal itself looks intact.
When a DIY Seal Is Not Enough
Stop if you find rotten wood, persistent water inside the wall, a loose frame, broken glass, or fogging between insulated panes. Those conditions are not a simple surface-gap repair. Cover exposed material from the weather if needed, then arrange an assessment by a qualified window contractor.
Take clear photos before covering the area. Photograph the gap, the surrounding trim, and any stain that appears after rain. Note whether the issue occurs on a windy day, after snowmelt, or only during a particular storm direction. Those details save time if a contractor needs to trace a concealed water path. They also prevent a cosmetic bead from hiding evidence of a larger frame repair.
Keep tools and unused tubes together after the job. A labelled bin makes seasonal maintenance faster. If your work area is also storage, this guide can help you organize a garage work area so sealants and hand tools are easy to find.
Make the Repair Last
Check perimeter joints each spring and fall, especially after severe weather. A short inspection catches a split edge before moisture reaches trim or wall finishes. With clean preparation and the right material, a careful repair can keep the window looking tidy and feeling more comfortable.
Conclusion
Learning how to reseal windows is less about adding more caulk and more about identifying the exact point where the seal has failed. Fixed joints around frames and trim need the correct flexible caulk, while moving sash joints usually require weatherstripping. Using the wrong material can create a temporary fix that quickly cracks or tears.
A lasting repair depends on careful preparation. Remove loose or damaged sealant, clean away dust and residue, allow the surface to dry completely, and use backer rod when a joint is too deep for a simple bead. Apply the new sealant steadily, smooth it carefully, and give it enough time to cure according to the manufacturer’s instructions.
FAQ
Inspect both sides. Exterior caulk protects fixed perimeter joints from weather. Interior caulk finishes narrow trim gaps, while weatherstripping belongs at the moving sash. Work only on the joint that has actually failed.
Only small, firmly bonded remnants can stay. Loose, cracked, or dirty material should come out first. New material needs a stable surface to hold its edge.
The draft may come from worn weatherstripping, a sash that does not close evenly, or a gap away from the new bead. Repeat the paper test and inspect the frame before adding more material. A second inspection often reveals the moving joint that a surface bead cannot seal.