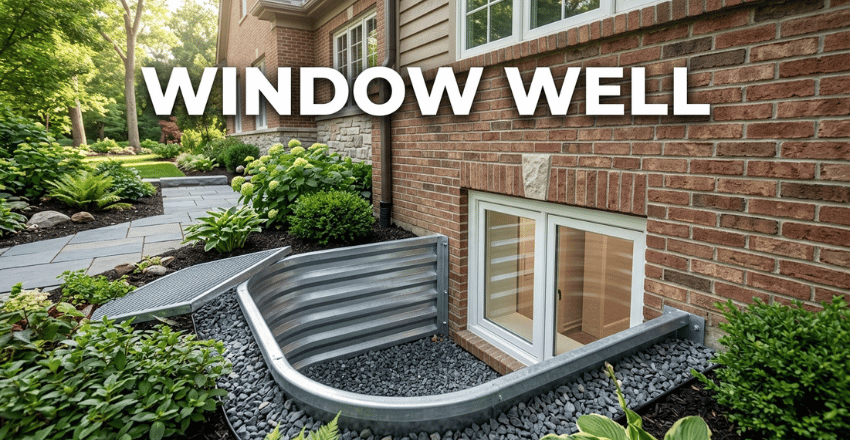
Dig a pit against a basement wall, line it, and you have a window well. Most homeowners never think about that pit until the basement smells damp, or an inspector puts a note beside the bedroom downstairs. It has three jobs: hold the soil back, let daylight reach the glass, and provide a route for water away from the frame.
Short answer: it is a lined pit that keeps soil off a below-grade window so light gets in, and water gets out. Clear stone fills the bottom, usually over a drain tied into the weeping tile. On a bedroom window, that pit is also the fire escape route, so building codes size it.
TL;DR
- Stone, not soil: 3/4-inch clear stone with no fines, roughly 200 to 300 mm deep.
- Most wells drain through a vertical pipe into the weeping tile or a sump pit.
- Bedroom egress: 0.35 m2 of opening, nothing under 380 mm, sill within 1.5 m of the floor.
- Clearance in front of the glass, by province: 550 mm in Ontario; 760 mm in Alberta.
- A steel liner costs CA$48 to CA$758. Cutting a new opening runs CA$3,500 to CA$8,000.
What a window well does, and why basements have one
Basement glass usually sits below grade. Backfill would bury it, so builders carve out a pocket and hold the soil back with a liner. Light and air get through, and the room downstairs stops feeling like a cellar.
The second job matters more.
Rain and meltwater run downhill toward the foundation, and the pocket is the lowest point for metres in any direction. When done right, water passes through the stone and disappears into the drainage system. Done wrong, it stacks up against a window that was never built to hold back a column of water. For a closer look at this, see Window Fan.
What a Canadian install looks like
| Part | Typical spec | Why it matters |
|---|---|---|
| Liner | Corrugated galvanized steel, moulded plastic, or poured concrete | Keeps backfill off the frame |
| Stone bed | 200 to 300 mm of 3/4-inch clear stone | Water sits in the voids instead of on the sill |
| Drain | Vertical pipe through the stone to the weeping tile or sump | Gives meltwater somewhere to go |
| Rim height | Roughly 75 mm above finished grade | Stops surface runoff pouring straight in |
| Grade around it | Soil sloping away from the wall | Keeps the yard from feeding the pit |
| Bedroom opening | 0.35 m2, no dimension under 380 mm | Fire escape route |
How the drainage actually works

The stone bed
Ask for 3/4-inch clear stone. Clear means washed, with the fines screened out, and those voids between the pieces are the whole point. Pit-run gravel packs down into something close to concrete after a couple of freeze cycles, and then nothing moves through it. Save it for the driveway.
Depth should be 200 to 300 mm, and the top of the stone belongs a good 100 mm below the sill. Anything shallower and one wet spring buries the drain in silt. Anything higher and you have built a shelf for water to sit on, right at the level of the frame. Neither ends well.
The drain, and where it goes
Under the stone in most Canadian builds, there is a vertical pipe. It drops to the footing and ties into the weeping tile, which carries water around the house to a sump pit or a storm connection. Older houses often have no pipe at all. Those wells rely on the soil below simply soaking up water, which works fine in sand but fails badly in clay.
Here is a test worth two minutes of your time.
Pour a 19 L pail of water into the pit and watch. Gone inside a minute means a live drain. Standing there after ten minutes means either a plug or no drain in the first place, and those two problems have very different price tags.
Grade and backfill
Half the water arriving in a well never fell into it. It ran across a lawn that slopes the wrong way, or soaked into loose backfill beside the wall and found the pit from the side. Fixing the grade beats every gadget you can buy, and it is the cheapest fix on this page.
Build the soil up so it drops by about 150 mm over the first 2 m out from the foundation, and place it in layers rather than as a single heap. Compacting backfill with a hand tamper as you go stops the trench settling into a bowl next winter. Keep downspouts discharging well past the well, never into it. That one is free.
Egress rules for a basement bedroom in Canada
Any room used for sleeping needs a way out that does not pass through the rest of the house. In a basement, that means the window, and the numbers below are not suggestions. An inspector measures them, and a fire does not negotiate over the last 20 mm.
Per the 2024 Ontario Building Code, in force as of January 1, 2025, an escape window in a bedroom must provide at least 0.35 m2 of unobstructed openable area. No dimension of that opening may be under 380 mm, and the sill can sit no higher than 1.5 m above the finished floor. Provincial editions of the national code carry the same three figures.
What varies is the pit itself. Ontario asks for 550 mm of clear projection in front of the window so a person can turn and climb. Alberta’s edition sets that at 760 mm, and Calgary requires permanent steps or a ladder once the well runs deeper than 1.2 m. Check with your municipal building department before you order anything.
Liners: steel, plastic, or concrete
Liner types compared
| Type | Price range | Lifespan | Watch for |
|---|---|---|---|
| Corrugated galvanized steel | CA$48 to CA$348 | 20 to 30 years | Rust starting at the soil line |
| Moulded plastic or composite | Similar money in small sizes | No rust at all | Goes brittle in deep cold, flexes if backfilled hard |
| Deep egress liner with steps | CA$448 to CA$758 | 20 to 30 years | Needs the projection your province requires |
| Poured or precast concrete | Contractor work, not a shelf price | Longest | Expensive to change your mind about later |
Those figures come from Home Depot Canada’s current galvanized range. It starts at CA$48 for a small 37-inch-deep well and tops out at CA$758 for a 60-inch-deep egress unit. Sizing is simpler than the catalogue makes it look. Measure the opening, add at least 150 mm of width on each side, then pick a projection that satisfies your code and leaves room to kneel and clean.
Why wells flood, and how to read the evidence
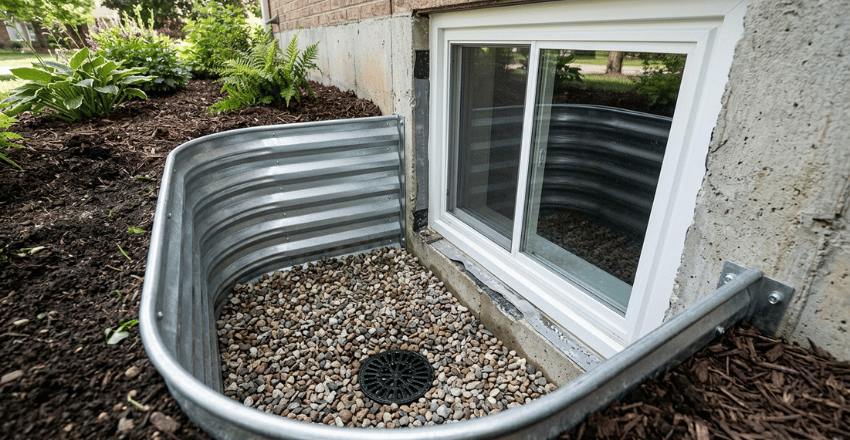
Standing water almost always traces back to one of five things. A buried drain, no drain, compacted stone, a rim below grade, or a lawn tilted the wrong way. The bucket test sorts the first two from the rest.
Winter adds a failure mode nobody warns about.
Snow drifts into an uncovered pit, thaws, then refreezes at the bottom. By February the drain is a plug of ice. Nothing looks wrong until March, when the melt arrives faster than frozen ground can take it, and the well fills in an afternoon. Clear the snow out during thaws, the same way you would clear a downspout.
If water is showing up inside while the pit stays dry, the well is not your problem. Look at the frame instead, because old caulking and tired weatherstripping leak long before anything structural does. Our guide to resealing windows properly covers that repair end-to-end.
Repair or replace, and what it costs
Surface rust and a few dented corrugations are cosmetic, so scrape, prime, and move on. Rust that has eaten through at the soil line is different, and so is a liner that pulls away from the wall or bows under pressure. Both mean the soil is already migrating in, and patching buys you at most a season.
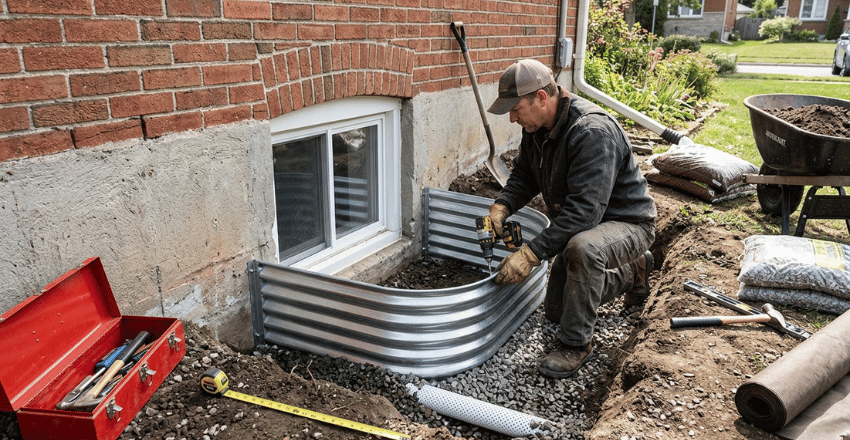
Swapping a liner yourself is a Saturday job. Dig out the stone, unbolt the old shell, set the new one plumb against the wall, then refill with fresh clear stone. Budget CA$48 to CA$348 for the shell plus a few bags of stone.
Canadian pricing, 2026
| Job | Typical cost |
|---|---|
| New opening cut, window and well | CA$3,500 to CA$8,000 |
| Enlarging an existing opening | CA$1,500 to CA$4,000 |
| Replacing the window only | CA$700 to CA$2,000 |
| Well drain and stone, installed | CA$500 to CA$1,500 |
| Excavation | CA$500 to CA$2,000 |
| Permit and inspection | CA$100 to CA$500 |
Cutting a new opening is structural work on a foundation wall, so it needs a permit and usually an engineer’s sign-off. Calgary’s building permit fees start near CA$334. Skipping the permit tends to surface later, either at a suite inspection or during an insurance claim. Permits are cheap. Rework is not.
Where covers fit
A lid keeps leaves, snow and the neighbour’s cat out, and it cuts your cleaning to almost nothing. On an egress opening, the rules tighten: the lid has to open from inside the pit, without tools and without knowing a trick. Polycarbonate domes and hinged grates both manage this, and both let daylight through. Solid plywood does neither. If you are shopping, our breakdown of well covers that keep debris out compares the styles and fixings in detail.
Window well FAQs
Usually ice. Snow packs in over winter, freezes at the base, and blocks the drain until well after the thaw begins. Clearing it during a January thaw prevents the March surprise.
Not in the bottom. Soil holds water against the foundation and silts up the drain within a season or two. Plant above the rim instead. Gravel only, down there.
No. A shallow well over sandy soil can drain on its own. Deep wells, clay soil, and any egress installation should have a pipe running to the weeping tile or a sump.
Between 200 and 300 mm of 3/4-inch clear stone, with the top surface at least 100 mm below the sill. Skip crushed gravel with fines in it, because it compacts and stops draining.